Buying your first used RV

Bring your notepad and pen because everything that jumps out at you should be written down, along with observations on the vehicle basics.

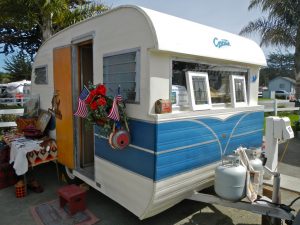
Guide to Buying your first used RV

Regardless of whether you are using craigslist, an auction, or your local RV dealer, steps should still be taken to make sure that you investigate all aspects of the vehicle including past care, maintenance, and overall condition. As they say, buying a home is the single largest purchase in your life, well consider this motorhome the 2nd largest purchase! Never let yourself get rushed into a purchase because you like it or the seller says they are only giving you this deal for a day. Take notes, compare prices and condition of competitive vehicles and relax. This process can be fun. Write down anything that catches your eye, needs attention or replacing. This way you can start to get a list of items of repair and personalization associated with the purchase as well. This information can be used as a negotiation tool as well. Always ask to test drive the vehicle and let the dealer know that you may even bring a mechanic to look at it.

Below is a list of items that I’ve compiled over several years of RVing, so no matter where you are in the purchasing process here are some points to take a closer look at.


  • Paperwork / License / Service History / Receipts / Title:

Before getting into the vehicle or taking a look, you’re going to want to look at the boring old paperwork of the vehicle. For starters double check the VIN number matches that on the vehicle title and license. From there you should get an idea of the owner history. How many owners has this vehicle had? Why was it last sold? Was it ever in any accidents? When satisfied with all of these answers get an idea of the service history of the vehicle. Ask if there have ever been any recalls on parts, if there was any major repair or damage, and if the oil has been changed on time.

After the history and title have been addressed, get a better understanding of the vehicles performance. Find out how much the vehicle can carry or transport. What is the maximum carrying capacity? Some vehicles come equipped with a very heavy frame designed for towing, and may leave minimal capacity for camping, fishing, and personal supplies. It’s of the utmost importance that the vehicle you buy matches your desired performance criteria.


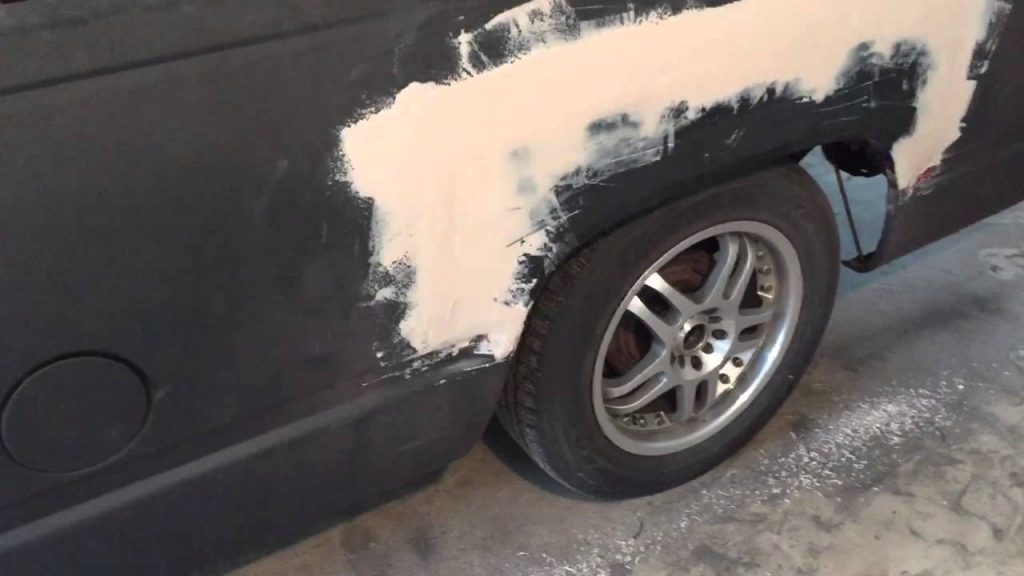
  • Rust and exterior damage

Before stepping foot in the vehicle or popping open the hood, make sure to look at the vehicle’s frame and exterior panels. Make note of the rust spots as well as the location on the vehicle. Many small rust spots can be contained and treated when caught early without any major damage to the frame or panels. Many people and sellers try to just paint over the rust, and this can be evident if the paint starts to bubble up over the spot. Make note of any of these areas as well. When estimating the damage of rust you need to understand the extent of the damage and get competitive quotes to determine the cost of the repairs and if the rust has caused any damage to the integrity of the RV.

Rust on a wheel well of an RV
  • Bathroom / Shower / Toilet

Now we can enter the vehicle, but before starting anything, take a look around and evaluate the interior. For starters, the bathroom is an excellent place to start. The toilet needs to hold water and flush properly. Give it two good flushes to evaluate how long it takes to refill and how consistently it flushes.


  • Flooring / Carpeting

Check the floors for dents, scrapes, and other damage. Areas that are particularly important are those around the sink in the kitchen and bathroom, as well as by the refrigerator. Any damp or soft spots are likely caused by faulty plumbing and need to be assessed and fixed before the purchase of a vehicle.


  • Ceilings

Look up! Following the same process with the floors, check the roof for any signs of damp or soft areas. Check in the lockers, cubbies, and cabinets as well. A damp ceiling can be caused by a leaky roof, and could cost a significant amount to fix.


  • Car and house batteries

RV’s often contain multiple batteries. The house batter is critical for the functioning of all the electrical systems including wall outlets, water heating, and the fridge and microwave. Check to see if a current is received at each outlet. Check both battery terminals for corrosion or damage.


  • Insulation

This may be difficult to assess without ripping the wall panels off, but ask for any documentation regarding the insulation installed.  No one wants to be left in the cold!


  • Propane or Natural Gas system

Inspect the gas tanks, hoses, regulators, and fittings. Many RV’s come with a certificate indicating passing gas performance. Check the heating system to make sure it functions and that the meters are working.  Make sure the heating vents work and can be turned on/off in each room. Make sure that there is enough heat for the entire vehicle to stay warm.


  • Air conditioning

Follow the same steps as we went through with the heating. Make sure the air conditioner can adequately cool the entire cabin, and that it doesn’t hiss or leak.


  • Brakes

Take the vehicle for a test drive and make sure that they are responsive and sensitive enough to stop in the event of an emergency. Get used to braking because the distance needed to stop may depend on the load you are carrying. Check the parking brake as well.


  • Overall comfort and support

Are you comfortable driving, as a passenger, in the bedroom, in the bathroom? Can you see yourself enjoying this vehicle?  These are all person dependent questions that you should ask before moving forward with the purchase.

Space Saving ideas to maximize the use of your RV

Proper organization and storage can turn a cluttered and stuffed RV into a well cared for and prestigious camping vehicle, and to be honest following these six steps can truly change your RV experience.

How to maximize space in an RV

We all know that the biggest challenge on a cross country RV tour is finding the room for everything you think you may need.  And this problem boils down to the simple task of organization. Because of the limited space in an RV, it’s far too easy for clutter to become overwhelming. Continue reading to see how you can carry all the stuff you want in your existing RV through organizational skills.


Take a one time inventory and toss what you truly don’t need

The first step to solving a problem, is to recognize that there is one! Take the time and make a list of all the items that you currently have in your RV and write down everything. If necessary break it down into a list of things that work and things that could use repair.

This will help define what is important or if you are transporting duplicates.

As you continue to make your way through all of your RVing stuff, make a note of all the stuff that you haven’t used on the last 2-3 trips. If you really don’t need it, now’s the time to take it out.

Ask yourself some tough questions like: Do you need all of these clothes? Do you need all of the plates, cups, and silverware? When’s the last time you read through some of the books or magazines in the back?

A good rule of thumb is, if you haven’t used it in the last 12 months, put it in storage somewhere else.

It may be a good idea to do a thorough clean before summer and before winter. In most cases there are specific items for each season that may be just taking up space.

Use our inventory Checklist here:

RV Space Saving Checklist and Inventory – Copy


Organize what is valuable and used into its own area

If you ever look at clutter, you’ll notice that it’s never a large item like a stove, microwave, or refrigerator that is taking up space and causing clutter. In most cases, it’s the small items lying around. This could range from, clothing, books, plates and bowls, fishing gear, extra shoes, or other nick nacks. These items should be accounted for on the list you should have just made, and be categorized into its own storage space. Remember the 12 month rule. If you haven’t used it in the last 12 months, find a new spot for it!

Create a spot for specific categories of items, like entertainment, outdoor gear, loose change and keys, etc.

Organize the bathroom

The bathroom is notorious for have a large number of small sized items. Get a small bathroom organizer to keep track of soap, shampoo, shaving, and other bathroom accessories. This will keep all of the critical bathroom items in one easy to use location. The other option is to get an organizer that hangs on the wall or the back of the bathroom door. These items allow for personal items, toiletries, and other specific items to be compartmentalized and easy to access.

Organize the kitchen  

Kitchens are always prone to clutter because it is one of the most used rooms in the RV. Items in use range from cooking utensils, to food, and even cleaning supplies. The real challenge is to find ways to store and match different types of storage ideas. In our RV we have a magnetic rack to hold many of the cooking utensils as well as a cabinet to store cups, plates, and other sharp objects. Then the space underneath the sink is perfect for a small trash bag as well as other cleaning supplies.


Storage bins, Storage bins, and more storage bins

If you’re struggling to group items into categories and store them away, try buying multiple smaller storage bins with multiple drawers. These drawers and shelves provide excellent organization in a compact space. You can even go as far as labeling them so you know that you will always go back and place the same items in the same spot. These can be used to store clothing, utensils, food, tools, and emergency equipment. Bottom line, storage bins are an excellent way to stay organized.


Foldable Items for Compact Storage and use

If you’re really tight on space to using foldable items. These can be packed up and stored when not in use. Foldable items can refer to tables, chairs, beds, and even bags or backpacks.


Replacing Siding On Your RV

When it comes to replacing siding on an RV on the house, many people get stuck in the train of thought that they have to hire some big company to come out to do the job. While it may be convenient to do that, not everyone has that kind of cash simply lying around the house. The biggest expense of having a company replace everything is the labor itself. The materials might cost a couple of thousand dollars, but that would only be a small fraction of the total cost to have a company come out to do the work for you.

You can, in fact, replace siding on an RV. First, you need to decide whether you are replacing all of it or just small sections. If everything appears to be in good shape and you just have a couple of pieces that are missing or broken, you can replace those without replacing everything. This, of course, would be the much cheaper route. However, if you have aluminum in your house, you will want to replace it all.

New blue siding replacedTo help cut down on your total expense for this update, you will want to take the aluminum to a scrap yard and cash it in. Depending on the amount of aluminum and the current pay out amounts, you could be looking at receiving a couple of hundred dollars up to a thousand dollars. This is a lot of money to get back. You can apply that directly to the purchase of your new siding. This way, the total cost of it all will be a little easier to handle. Also, you would be recycling which is a great thing all on its own.

Before you start the job, you will want to make sure that you have everything you need as far as materials. You also want to make sure that you have another person working with you. Ladder climbing is going to be involved, and it is not safe to do this alone in case of an accident. Even if the person hanging around can do nothing more than keeping an eye out on you, that is better than being alone.

You will also want to realize that this is not a one day job. Doing this yourself could take a week or two weeks depending on your skill and how quickly you move. Of course, you do not want to rush the job, but you also do not want to take forever as you leave half of your house exposed to the elements. You want to keep moving until the job is complete.

Once it is all said and done you will look back and realize that it was not as hard as you first thought. You will have saved yourself an incredible amount of money, and you will be able to take pride in knowing that you did it yourself.

Replacing Carpet In Your RV

Man cutting carpet squares out of RV
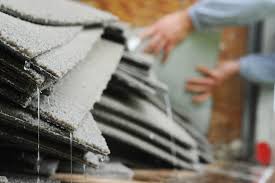
Carpet enhances the attraction of your room, but you have to care for them if you want them to last long. Not caring for them or buying cheap carpets can lead to frequently changing your carpets and extra expenditure.

When you look which someone have accidentally spilled the glass of water or even dropped the cigarette on which favorite carpets of yours, you may have got worried thinking how to set things right again. Even the horrible marks that your beloved puppy has etched on the carpet can be the cause of big trouble. However, you don’t need to lose sleep thinking how to replace carpeting in an RV. Follow a few easy tricks and perform some patchwork to give back your carpet its original look.

If the damage to your carpeting is minor, you can only trim the pile. All that you will need to do is to cut the spoiled ends. Manicure scissors will help you perform this task sans problem. However, chop off carefully, or you will end up cutting a significant part of the good area.

You may even replace carpet in an RV by trimming the damaged fibers till the backside of the rug. Many DIY-ers use replacement threads to fix their damaged carpets. You too can procure these fibers easily. Use those parts of the carpet that are less visible (like the part that lie beneath a cabinet or below some big furniture) to get the replacement fibers. Before you attach the replacement fibers to the carpet backing, apply a small amount of clear adhesive to the base of the former. Be careful while fixing the fibers or you will spill the glue and make the adjacent area of the carpet messy.

If the damage to your carpeting is more severe or consists of a large sized stain, you have to replace carpet in an RV. According to experts, replacement pieces that resemble geometrical shapes like that of a triangle and circle are less prone to being detected as compared to rectangular and square pieces. You can cut the replacement piece of your preferred shape using your utility knife and fasten it to the damaged part using two-sided carpet-tape and an adhesive of high quality. So, don’t bid farewell to your spoiled carpeting. Instead, repair it using the steps as mentioned earlier.

When to Replace Carpet in an RV.

Man preparing the floor beneath carpeting
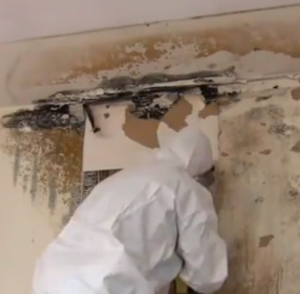
You need to consider replacing the car interior carpet of your automobile if it is old or has been neglected. Yes, you can clean the upholstery but a time comes when no amount of elbow grease is going to get those stains out. Your vehicle may smell a bit as well. If it does it is the time to pull that carpet up.

You can change the car interior carpet yourself. You do not need any particular DIY skills to do it although it would be best if you had little knowledge. If you have never done anything like this before you may want to speak to your local auto repair shop and get a quote. It may be less expensive than you imagine and they will take a lot less time to do it then you will.

Whether the carpet is easy to remove or not will depend on how it was initially laid. If it was bonded with glue or similar adhesive it may be difficult to remove. Some manufacturers didn’t use glue, so it is easier to remove the upholstery in these automobiles. If you can remove the seats, do so as it will make fitting the new flooring so much easier.

When you have installed the new carpet, keep it in top condition with regular cleaning. Invest in some foot mats as well so that you don’t have a buildup of the day to day dirt. Vacuum on a regular basis and every so often gives it a good wash with a rug detergent. If you spill something clean it as soon as possible, otherwise the stain will set making it harder to get rid of. When buying your new carpet, choose a high quality car interior carpet as they will last longer and also cause less electricity in the automobile.

Replacing Windows in an RV

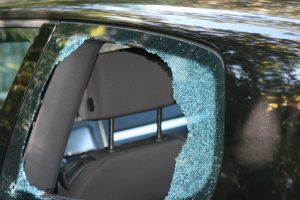
Before embarking on the project of replacing your window in an RV, there are a few things you should make sure you are clear on. Which include the following: You must have a clear budget in mind and make sure you stick to your guns, do not waiver or compromise: perform the necessary research you need on different contracting companies if you intend on using that route; at least have details of no less than three separate quotations: when you are doing your research you should request free in house estimates; avoid by all means making decisions on the spot; give yourself at least two days to look over the different the quotations from the companies; pick one and then clearly state how you want your replacement window installed and find out on their warranty policy and if there are any deals relating to tax credit when installing new energy efficient windows.

How to Replace A Window in an RV?

Well, you can as mentioned earlier go with the do it yourself method. This is an option with the advantage of saving you a substantial amount of money. But then there is the opportunity cost that also has to be factored in. You can expect to take about roughly four to six hours to install a window of average size on the ground floor (note time increases exponentially if it’s not being installed on the first floor). Money spent on this project can be estimated to be between $500.00 to $600.00. If you are for instance putting in a high performance 36 by 54-inch wood insert replacement window. The project may not be rocket science, but it’s no child’s play either: it requires at least an average amount of carpentry expertise and remodeling homes experience, the installation process is made relatively easier if the window being installed is on the ground making it readily available from the outside of the house.

But there is the issue that if you go on about this tasks yourself without the assistance of a professional contractor, you will end up with an average looking job. Though it may seem like you would have saved money, in true essence, in the long run, it is not worth it. There is too much unnecessary stress arising from frustration which is noted by most who take the do it yourself route. The is also time consumed doing this task, especially if the window is not on the ground floor and back and forth movement due to the window not being the right size; which is one of the many problems noted by reviewers who have tried this before and the is the risk of applying to much-expanding form which will move the frame in the long run.

The Best Way to Replace A Window in an RV

With the above in mind, I would recommend that you hire the services of a contractor. A contracting company that has received good ratings and reviews, that knows very well how to replace a window. The amount you save in the long run dwarfs that you will spend doing the job yourself. There is also the feeling you will get when you see the perfectly installed window… priceless.

I hope you will seek the assistance of a professional contracting company on how to replace a window. You can read more on the additional information section of this publication on what you need to know when looking for a contracting company that is reliable.

Summary

• You can use the do it yourself method when you want to replace a window though it is not recommended.

• You can expect you do it yourself project to take roughly four to six hours and cost around $500.00 to $600.00.

• Though you may save money doing it yourself, the cost, in the long run, is not worth it.

• Employ the services of a contractor to save you time, money and a lot of stress.

Additional Information

When looking for a window contractor or replacement windows company make sure that you use word of mouth as your basis of the search. Ask around friends, family, and people in your immediate circle for references on people who conducted the job for them. Make a request for a portfolio and ask for references, make sure your contractor possesses diverse experiences and ensure that they are well aware of all safety precautions.